← Projects & Plans · Bird & wildlife boxes · No. 02
Bird Box No 2
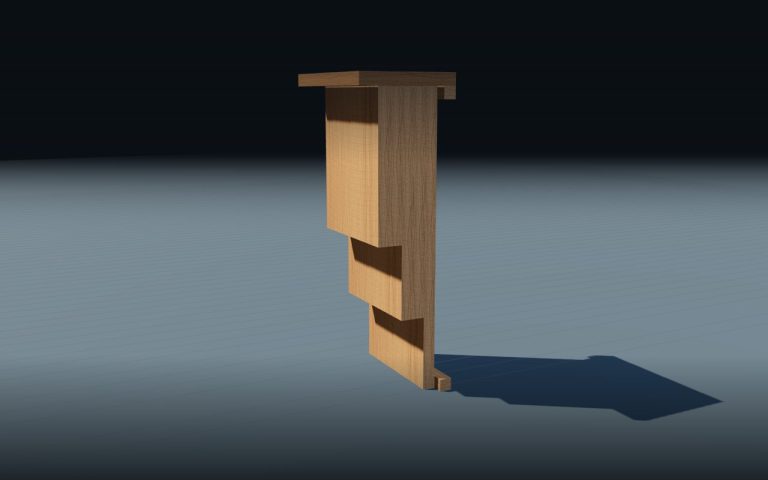
A slope-roof bird box from one 6×1 and one 4×1. A single 30° bevel cut makes the tops of the back and front, and less than 40 mm of wood is left over.
What the levels mean
- Difficulty 1 of 51 · First buildHand saw, straight cuts and screws. About 1–2 hours. Fine for complete beginners and supported learners.
- Difficulty 2 of 52 · BeginnerAdds angle cuts and drilling. Some steps need a helper.
- Difficulty 3 of 53 · ImproverBevels, rip cuts and a power saw, with more parts to keep square. About half a day.
- Difficulty 4 of 54 · ConfidentProper joints like halving and mortise, where measuring accuracy matters. About a day.
- Difficulty 5 of 55 · AdvancedFrames and structures, heavy parts, two people and several days.
Drag to look around. Use the chapters along the bottom to jump between stages.
02 · Tools & materials
Everything you need.
Gather it all before you start. Tick things off as you go: the ticks stay on this device.
Tools
Materials & cost
| Item | Per build | You need | Buy | Price | Cost |
|---|---|---|---|---|---|
| 6×1 planed board, 700 mm needed (sold in 2.4 m lengths, 144 × 20.5 mm)Estimate. One 2.4 m board makes three boxes | 0.33 board | £per board | |||
| 4×1 planed board, 600 mm needed (sold in 2.4 m lengths, 94 × 20.5 mm)Wickes PSE 20.5 × 94 × 2400 mm, October 2026. One board makes four boxes | 0.25 board | £per board | |||
| Wood screws 4 × 40 mmScrewfix Goldscrew 200-pack, October 2026 | 16 screws | £per pack | |||
| Metal hanging bracketEstimate | 1 bracket | £per bracket | |||
| Total | |||||
A rough guide, not a quote. Prices are typical UK examples checked in October 2026, including VAT and before delivery. They change often and vary between merchants, and timber sizes do too, so check before you buy. Reclaimed or offcut timber can bring the cost close to nothing. Tap any price to change it.
Converted from millimetres and rounded to the nearest 1/16″. This plan is drawn for UK metric timber. US lumber sizes differ (a 1×6 is 5½″ × ¾″), so check widths and thicknesses before you cut.
03 · Cut list
Two boards, six parts.
| Part | Name | Size (mm) | Qty | Notes |
|---|---|---|---|---|
| 01 | Front | 150 × 200 / 188 | 1 | From the 6×1. 30° bevel top, Ø28 entrance hole centred 150 up |
| 02 | Back | 150 × 258 / 269 | 1 | From the 6×1. 30° bevel top, made by the same cut as the front |
| 03 | Sides | 100 × 200 / 258 | 2 | From the 4×1. One sloped cut splits the two sides |
| 04 | Floor | 110 × 100 | 1 | From the 4×1. Fits between the sides |
| 05 | Roof | 220 × 150 | 1 | From the 6×1. Sits flat on the bevelled tops, about 40 mm past the front |
| — | 6×1 board | 700 × 150 × 20 | 1 | Planed or reclaimed timber |
| — | 4×1 board | 600 × 100 × 20 | 1 | Less than 40 mm left over across both boards |
| — | Screws | 40 long | 16 | Plus one metal bracket for hanging |
Converted from millimetres and rounded to the nearest 1/16″. This plan is drawn for UK metric timber. US lumber sizes differ (a 1×6 is 5½″ × ¾″), so check widths and thicknesses before you cut.
04 · Instructions
Six steps.
- 1
Mark out both boards
Mark the roof, back and front on the 6×1, and the two sides and the floor on the 4×1. Write the part number on each piece.
- 2
Cut the 6×1
Cut the roof off square. Then make one 30° bevel cut between the back and the front: that single cut gives both of them their sloped tops.
✋ Helper needed - 3
Cut the 4×1
Mark a sloped line 200 mm on one edge and 258 mm on the other, and cut along it to split the two sides. Cut the floor to 110 mm.
✋ Helper needed - 4
Drill the entrance
Mark the centre 150 mm up the front and drill a 28 mm hole.
✋ Helper needed - 5
Build the box
Fix the sides to the floor, then add the back and the front. Two screws at each joint.
- 6
Fit the roof
Screw the roof onto the bevelled tops so it overhangs the entrance, then fit the bracket and hang it out of direct sun.
05 · Learning layer
The maths inside Box No 2.
The 30° roof is where the numbers come from. In sessions we work these out on the bench before cutting.
258 − 200 = 58Subtraction: how much taller the back is than the front.100 × tan 30° ≈ 58Angles: across 100 mm of side, a 30° slope rises about 58 mm. Same answer.One cut → two topsPlanning: cutting the bevel between the back and front shapes both pieces at once.Ø28 → r = 14Circles: the radius is half the diameter. Mark the centre first.The maths stays in millimetres: it's how the plan was measured and how it's taught.
06 · Plans
Take the plan to the bench.
Easy plan
18 pages · 11 steps · A4 or phoneOne step per page with big pictures. Explains what a bevel is in plain words.
Download ↓Quick plan
2 pages · both boards to scale and a cut listFor confident makers: the cutting layout, the cut list and six build pictures.
Download ↓Make it with me
Sessions · groups · privateBuild it in a session with tools and timber ready to go.
Ask about a session →Keep making